Posted on January 8, 2016
21 minutes
Mamadou Babaei
Picture A: Gray (black and white) post-processing effect in Cocos2d-x
Update [2020/10/23]:Since I wrote this tutorial many things has changed in Cocos2d-x and I haven’t been using it in years as I switched to Unreal Engine 4. According to this GitHub issue opened by my blog readers, in order for this code to work there has to be some modifications to the code which is provided on that issue by @lazerfalcon and @madrazo. I was also having trouble with render to texture on Sprite3D which seems to have been solved in newer versions.
Despite the fact that Cocos2d-x uses the OpenGL ES Shading Language v1.0 for the shaders (in order to learn more about the language, please refer to: OpenGL ES Shading Language v1.0 Spec) the engine does not provide an out-of-the-box API to apply post-processing effects to the whole game scene output at once.
In this tutorial we will learn an easy way to apply multiple post-processing effects to the game scene output all at once.
OK, the code I provide here developed based on a combination of the solutions that provided on this Stackoverflow question and this Saeed Afshari’s blog post which I merged and customized based on my own requirements. A big kudos to their work.
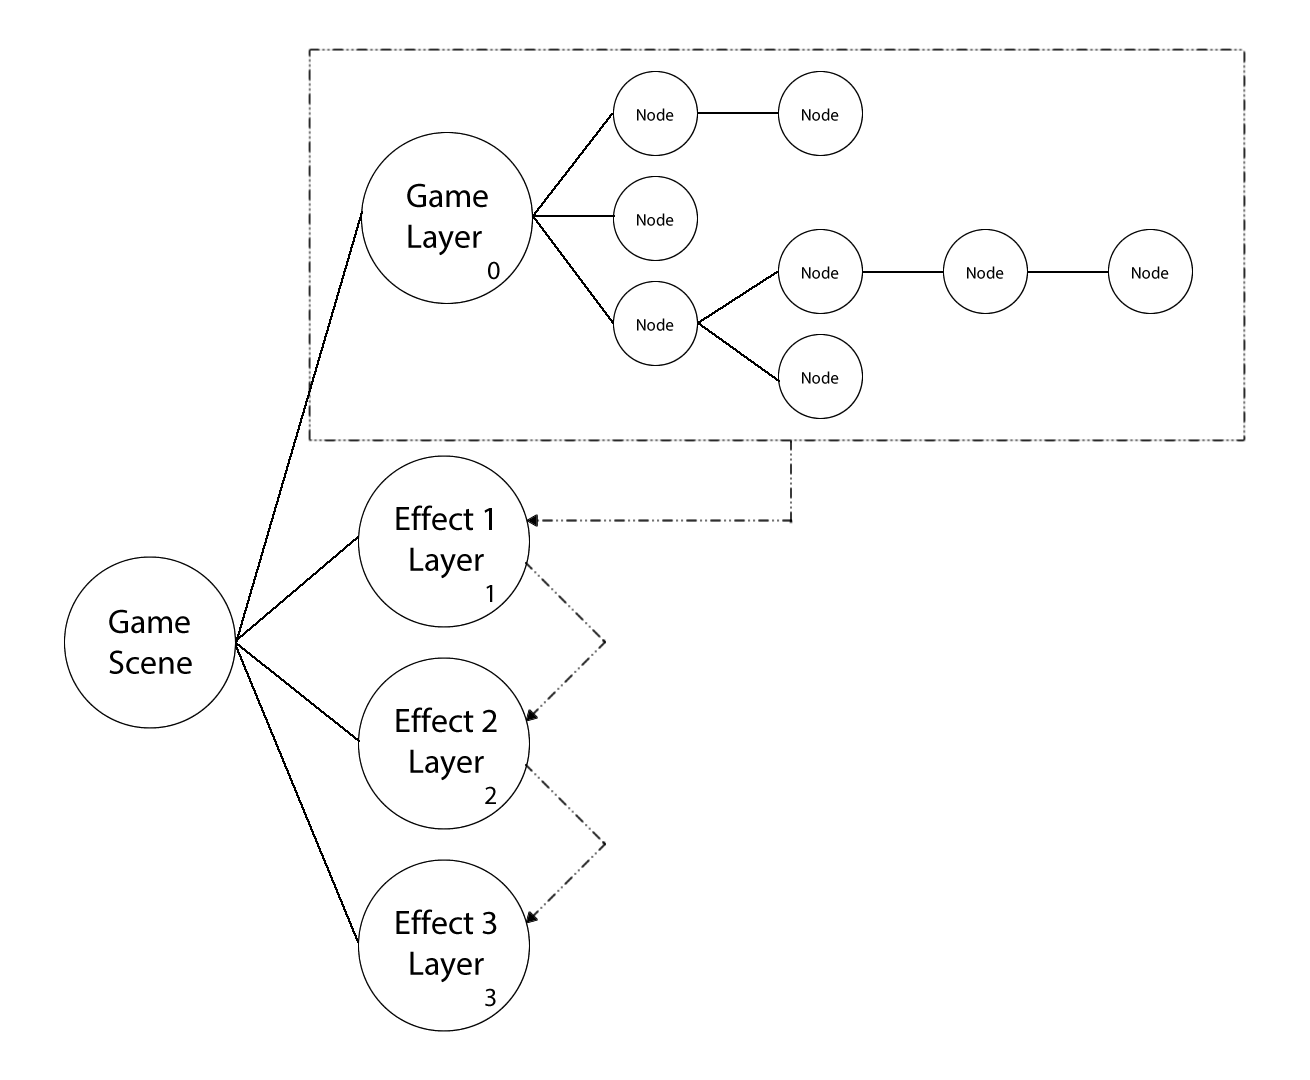
So, back to our work, I did summarize the flow for the solution as in the following diagram:
Picture B: Post-processing workflow diagram
From now on, in order to make life simpler and subsequently easier, we have to (re-)structure our game scene a bit according to the diagram above (picture B.). Although it’s self explanatory, let’s explain what’s happening here:
Every single sprite, label, button and so on (basically all nodes in the game no matter if they are visible or not) goes into a layer we call gameLayer. It can also be called mainLayer or whatever you prefer. We give it a low z-order value, e.g. 0.
For every post-processing effect, we create a layer on top of the main game layer - or the previous post-processing effect layer if we already have at least one - with a higher z-order value. Note that the gameLayer and all the effects layers are all siblings and share the same parent node which is the main scene that we call GameScene (take a look at picture B. again).
We do things as normal in the gameLayer and nothing special happens, except one thing. In each tick (update event) of the GameScene (not to be confused with gameLayer) we have to redirect gameLayer’s rendered output to the next effect layer and apply the first effect to the game output. Then we take the output and redirect it to the next top layer and apply another effect. This process goes on and we apply one effect at a time till we reach the last effect in the row and process it as the final output. If you look at the dashed lines in the diagram you will know what I mean. This technique is called multi-pass rendering that we achieve in Cocos2d-x by rendering the output to an off-screen texture at each step. At the end that texture gives us a sprite that we’ll show to end-user instead of the actual gameLayer.
We must be able to disable or enable any effect in the hierarchy as easy as possible. For example, remove effect number 2 in the picture B. and redirect the output of effect number 1 to number 3. Hopefully we we’ll get to that later.
Let’s make an example. First assume we want to create a color transition post-processing effect - which we’ve got an OpenGL shader for - and after that we want to apply another post-processing effect - which we’ve got another OpenGL shader for - that makes the whole output black and white:
1. First, we create our main game layer according to the diagram that we’ll call gameLayer:
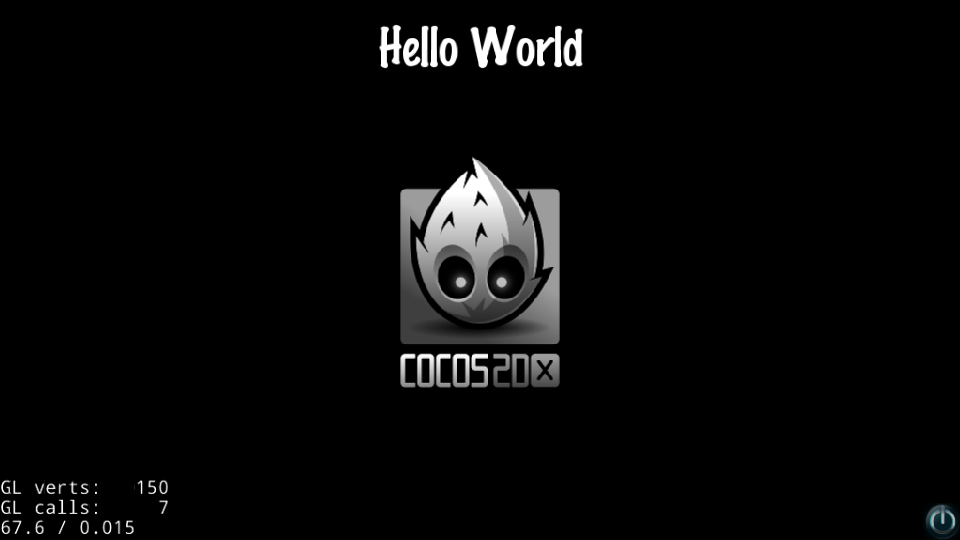
Picture C: Cocos2d-x Hello World game scene which we move into gameLayer
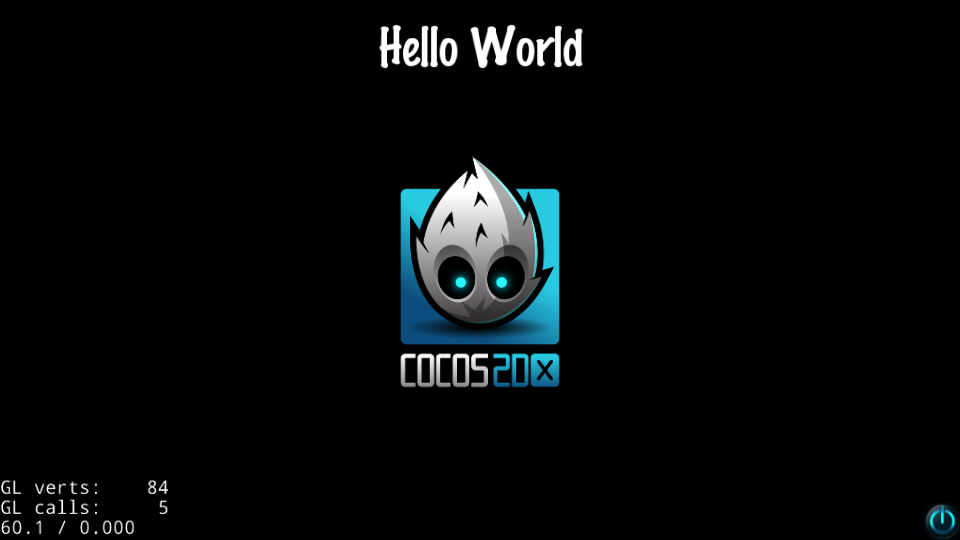
2. Then, we create another layer on top of that which we call colorPostProcessLayer for the color transition effect. It gives us this:
Picture D: Color transition post-processing effect in Cocos2d-x
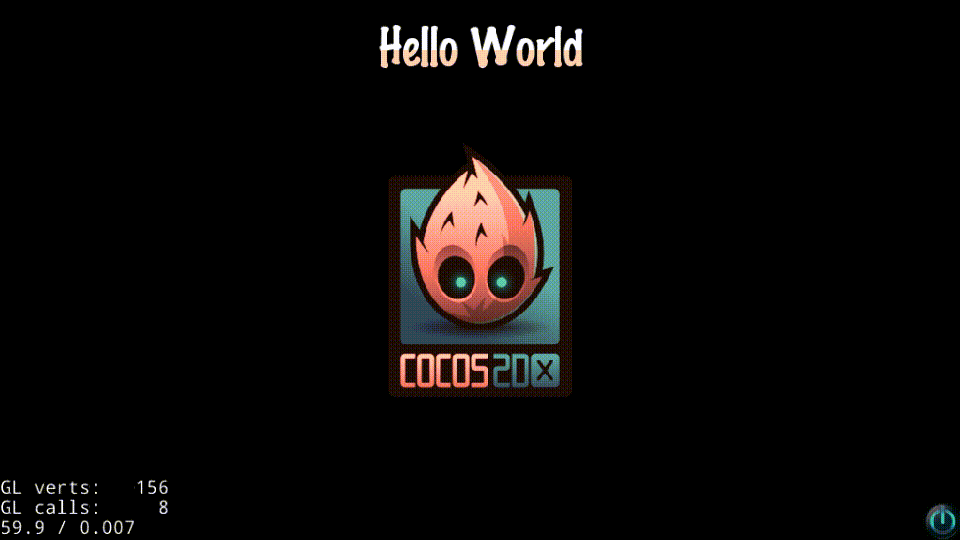
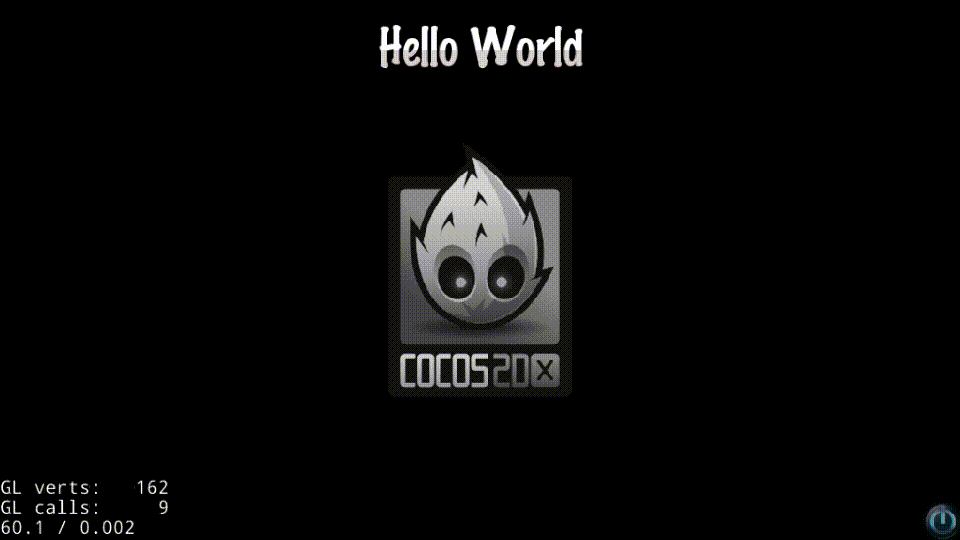
3. Now, we create the final layer on top of both layers that we call greyPostProcessLayer which should generate this:
Picture E: Gray (black and white) color transition post-processing effect in Cocos2d-x
As it can be seen from both gifs, we first get the color transition effect and then on top of that a nice gray effect. Now, let’s get to the more technical stuff and the actual code without wasting any more time.
Let’s begin. So, in order to be able to apply post-processing effects to your game, there are three files - except the shader files - that you have to add to your project which I’ll break down and describe as we continue (do not worry I’ll provide you with the shader files, too). But, beforehand, it’s a good idea to create a new Hello World Cocos2d-x project in order to be able to follow this tutorial. For the sake of this tutorial I kept the changes to HelloWorldScene.cpp and HelloWorldScene.h minimum which I’ll mention as we go on.
Since in contrast to make_shared, C++11 does not provide make_unique and it’s a C++14 feature, your compiler may not support it, so, you have to add the following file to your project, because the main code relies on it. Even if your compiler is C++14-enabled and does support it you have to still include it or your compiler stops with a file not found complain or something similar due to an include error at compile time. Do not worry, your compiler still uses its own version of make_unique and leaves this file out once it reaches the platform check - #if CC_TARGET_PLATFORM == CC_PLATFORM_ANDROID - in this header file. I included this file for Android NDK which does not support C++14 at the time. In fact, my main development environment is Visual Studio 2013 Update 5 at the moment which supports make_unique. If your compiler does not support it you have to modify that platform check line and add your platform to that line to include this implementation of make_unique, or else the main code fails to build.
/**
* @file
* @author Mamadou Babaei <info@babaei.net>
* @version 0.1.0
*
* @section LICENSE
*
* (The MIT License)
*
* Copyright (c) 2016 Mamadou Babaei
*
* Permission is hereby granted, free of charge, to any person obtaining a copy
* of this software and associated documentation files (the "Software"), to deal
* in the Software without restriction, including without limitation the rights
* to use, copy, modify, merge, publish, distribute, sublicense, and/or sell
* copies of the Software, and to permit persons to whom the Software is
* furnished to do so, subject to the following conditions:
*
* The above copyright notice and this permission notice shall be included in
* all copies or substantial portions of the Software.
*
* THE SOFTWARE IS PROVIDED "AS IS", WITHOUT WARRANTY OF ANY KIND, EXPRESS OR
* IMPLIED, INCLUDING BUT NOT LIMITED TO THE WARRANTIES OF MERCHANTABILITY,
* FITNESS FOR A PARTICULAR PURPOSE AND NONINFRINGEMENT. IN NO EVENT SHALL THE
* AUTHORS OR COPYRIGHT HOLDERS BE LIABLE FOR ANY CLAIM, DAMAGES OR OTHER
* LIABILITY, WHETHER IN AN ACTION OF CONTRACT, TORT OR OTHERWISE, ARISING FROM,
* OUT OF OR IN CONNECTION WITH THE SOFTWARE OR THE USE OR OTHER DEALINGS IN
* THE SOFTWARE.
*
* @section DESCRIPTION
*
* C++14 std::make_unique workaround for C++11-enabled compilers
*/#ifndef MAKE_UNIQUE_HPP
#define MAKE_UNIQUE_HPP
#include"platform/CCPlatformConfig.h"#if CC_TARGET_PLATFORM == CC_PLATFORM_ANDROID
#include<memory>#include<utility>namespace std {
template<typename T, typename ...Args> std::unique_ptr<T> make_unique(Args&& ...args)
{
return std::unique_ptr<T>(new T(std::forward<Args>(args)...));
}
}
#endif // CC_TARGET_PLATFORM == CC_PLATFORM_ANDROID
#endif // MAKE_UNIQUE_HPP
OK, here is the header file for the PostProcess class which we use to create one post-processing effect at a time inside our game:
/**
* @file
* @author Mamadou Babaei <info@babaei.net>
* @version 0.1.0
*
* @section LICENSE
*
* (The MIT License)
*
* Copyright (c) 2016 Mamadou Babaei
*
* Permission is hereby granted, free of charge, to any person obtaining a copy
* of this software and associated documentation files (the "Software"), to deal
* in the Software without restriction, including without limitation the rights
* to use, copy, modify, merge, publish, distribute, sublicense, and/or sell
* copies of the Software, and to permit persons to whom the Software is
* furnished to do so, subject to the following conditions:
*
* The above copyright notice and this permission notice shall be included in
* all copies or substantial portions of the Software.
*
* THE SOFTWARE IS PROVIDED "AS IS", WITHOUT WARRANTY OF ANY KIND, EXPRESS OR
* IMPLIED, INCLUDING BUT NOT LIMITED TO THE WARRANTIES OF MERCHANTABILITY,
* FITNESS FOR A PARTICULAR PURPOSE AND NONINFRINGEMENT. IN NO EVENT SHALL THE
* AUTHORS OR COPYRIGHT HOLDERS BE LIABLE FOR ANY CLAIM, DAMAGES OR OTHER
* LIABILITY, WHETHER IN AN ACTION OF CONTRACT, TORT OR OTHERWISE, ARISING FROM,
* OUT OF OR IN CONNECTION WITH THE SOFTWARE OR THE USE OR OTHER DEALINGS IN
* THE SOFTWARE.
*
* @section DESCRIPTION
*
* Provides post-processing functionality for Cocos2d-x games.
*/#ifndef POST_PROCESS_HPP
#define POST_PROCESS_HPP
#include<memory>#include<string>#include"cocos2d.h"classPostProcess:public cocos2d::Layer
{
private:structImpl;
std::unique_ptr<Impl> m_pimpl;
public:static PostProcess* create(const std::string& vertexShaderFile, const std::string& fragmentShaderFile);
private: PostProcess();
virtual~PostProcess();
public:virtualbool init(const std::string& vertexShaderFile, const std::string& fragmentShaderFile);
public:void draw(cocos2d::Layer* layer);
};
#endif // POST_PROCESS_HPP
As it can be seen it has been sub classed from cocos2d::Layer. Like most Cocos2d-x objects it can be instantiated using a static create method. It accepts a vertex shader file and a fragment shader file address on the file system which technically are OpenGL programs that we use to create shaders. We use init method to (re)initialize the object. Please note that it will be called automatically once you call create method, so there is no need to call this method manually.
The only important method this class provides is draw. It accepts a layer by reference as its sole parameter which basically is being used to generate the output with the shader program applied on.
There is also an opaque pointer which was used to implement Pimpl idiom (a.k.a the compilation firewall or Cheshire Cat technique). Pimpl is an abbreviation for private implementation which as the name implies is used to hide the private implementation of a class. Its immediate benefit is that it avoids rebuild cascades. In fact, your compile-time significantly improves every time you modify the private implementation, because you do not have to rebuild every file that included that header file. You just build one file and re-link.
/**
* @file
* @author Mamadou Babaei <info@babaei.net>
* @version 0.1.0
*
* @section LICENSE
*
* (The MIT License)
*
* Copyright (c) 2016 Mamadou Babaei
*
* Permission is hereby granted, free of charge, to any person obtaining a copy
* of this software and associated documentation files (the "Software"), to deal
* in the Software without restriction, including without limitation the rights
* to use, copy, modify, merge, publish, distribute, sublicense, and/or sell
* copies of the Software, and to permit persons to whom the Software is
* furnished to do so, subject to the following conditions:
*
* The above copyright notice and this permission notice shall be included in
* all copies or substantial portions of the Software.
*
* THE SOFTWARE IS PROVIDED "AS IS", WITHOUT WARRANTY OF ANY KIND, EXPRESS OR
* IMPLIED, INCLUDING BUT NOT LIMITED TO THE WARRANTIES OF MERCHANTABILITY,
* FITNESS FOR A PARTICULAR PURPOSE AND NONINFRINGEMENT. IN NO EVENT SHALL THE
* AUTHORS OR COPYRIGHT HOLDERS BE LIABLE FOR ANY CLAIM, DAMAGES OR OTHER
* LIABILITY, WHETHER IN AN ACTION OF CONTRACT, TORT OR OTHERWISE, ARISING FROM,
* OUT OF OR IN CONNECTION WITH THE SOFTWARE OR THE USE OR OTHER DEALINGS IN
* THE SOFTWARE.
*
* @section DESCRIPTION
*
* Provides post-processing functionality for Cocos2d-x games.
*/#include"make_unique.hpp"#include"PostProcess.hpp"usingnamespace std;
usingnamespace cocos2d;
structPostProcess::Impl
{
public: GLProgram* glProgram;
RenderTexture* renderTexture;
Sprite* sprite;
private: PostProcess* m_parent;
public:explicit Impl(PostProcess* parent);
~Impl();
};
PostProcess* PostProcess::create(const std::string& vertexShaderFile, const std::string& fragmentShaderFile)
{
auto p =new (std::nothrow) PostProcess();
if (p && p->init(vertexShaderFile, fragmentShaderFile)) {
p->autorelease();
return p;
}
else {
CC_SAFE_DELETE(p);
returnnullptr;
}
}
PostProcess::PostProcess()
: m_pimpl(make_unique<PostProcess::Impl>(this))
{
}
PostProcess::~PostProcess()
{
m_pimpl->renderTexture->release();
}
bool PostProcess::init(const std::string& vertexShaderFile, const std::string& fragmentShaderFile)
{
if (!Layer::init()) {
return false;
}
m_pimpl->glProgram = GLProgram::createWithFilenames(vertexShaderFile, fragmentShaderFile);
m_pimpl->glProgram->bindAttribLocation(GLProgram::ATTRIBUTE_NAME_COLOR, GLProgram::VERTEX_ATTRIB_POSITION);
m_pimpl->glProgram->bindAttribLocation(GLProgram::ATTRIBUTE_NAME_POSITION, GLProgram::VERTEX_ATTRIB_COLOR);
m_pimpl->glProgram->bindAttribLocation(GLProgram::ATTRIBUTE_NAME_TEX_COORD, GLProgram::VERTEX_ATTRIB_TEX_COORD);
m_pimpl->glProgram->bindAttribLocation(GLProgram::ATTRIBUTE_NAME_TEX_COORD1, GLProgram::VERTEX_ATTRIB_TEX_COORD1);
m_pimpl->glProgram->bindAttribLocation(GLProgram::ATTRIBUTE_NAME_TEX_COORD2, GLProgram::VERTEX_ATTRIB_TEX_COORD2);
m_pimpl->glProgram->bindAttribLocation(GLProgram::ATTRIBUTE_NAME_TEX_COORD3, GLProgram::VERTEX_ATTRIB_TEX_COORD3);
m_pimpl->glProgram->bindAttribLocation(GLProgram::ATTRIBUTE_NAME_NORMAL, GLProgram::VERTEX_ATTRIB_NORMAL);
m_pimpl->glProgram->bindAttribLocation(GLProgram::ATTRIBUTE_NAME_BLEND_WEIGHT, GLProgram::VERTEX_ATTRIB_BLEND_WEIGHT);
m_pimpl->glProgram->bindAttribLocation(GLProgram::ATTRIBUTE_NAME_BLEND_INDEX, GLProgram::VERTEX_ATTRIB_BLEND_INDEX);
m_pimpl->glProgram->link();
m_pimpl->glProgram->updateUniforms();
auto visibleSize = Director::getInstance()->getVisibleSize();
m_pimpl->renderTexture = RenderTexture::create(visibleSize.width, visibleSize.height);
m_pimpl->renderTexture->retain();
m_pimpl->sprite = Sprite::createWithTexture(m_pimpl->renderTexture->getSprite()->getTexture());
m_pimpl->sprite->setTextureRect(Rect(0, 0, m_pimpl->sprite->getTexture()->getContentSize().width,
m_pimpl->sprite->getTexture()->getContentSize().height));
m_pimpl->sprite->setAnchorPoint(Point::ZERO);
m_pimpl->sprite->setPosition(Point::ZERO);
m_pimpl->sprite->setFlippedY(true);
m_pimpl->sprite->setGLProgram(m_pimpl->glProgram);
this->addChild(m_pimpl->sprite);
return true;
}
void PostProcess::draw(cocos2d::Layer* layer)
{
m_pimpl->renderTexture->beginWithClear(0.0f, 0.0f, 0.0f, 0.0f);
layer->visit();
// In case you decide to replace Layer* with Node*,
// since some 'Node' derived classes do not have visit()
// member function without an argument:
//auto renderer = Director::getInstance()->getRenderer();
//auto& parentTransform = Director::getInstance()->getMatrix(MATRIX_STACK_TYPE::MATRIX_STACK_MODELVIEW);
//layer->visit(renderer, parentTransform, true);
m_pimpl->renderTexture->end();
m_pimpl->sprite->setTexture(m_pimpl->renderTexture->getSprite()->getTexture());
}
PostProcess::Impl::Impl(PostProcess* parent)
: m_parent(parent)
{
}
PostProcess::Impl::~Impl() =default;
There are three important objects that we hold inside our Impl class and therefore m_pimpl object:
glProgram is the shader program that we are running on the output.
renderTexture is the off-screen texture that we use to render the whole screen output to. It gives us a sprite as its final output.
sprite object is an on-screen object that is used to show the result after we applied the shader on. Technically, it’s the visual representation of the PostProcess object on the screen. We constantly generate its content from the sprite that renderTexture gives us.
If you take a look at Postprocess::init() method:
We initialize the glProgram object.
We resize renderTexture to the visible portion of the game on the screen.
We initialize the sprite object from the sprite that we acquire from renderTexture. So, its size is equal to the size of renderTexture which basically is visible size of the game. Then, we flip the texture vertically due to the fact that the rendered image is stored back-wards in memory. Afterwards, we run the OpenGL shader on the sprite. Finally, we add the sprite to the current layer which will be instantiated from PostProcess class.
Now let’s take a look at Postprocess::draw() method:
We start by clearing the renderTexture object.
Then, we call the visit() method of the layer object which was passed to this method as an argument. This in turn will call every single child’s visit() method. If you take a look at cocos2d::Node::visit() - since cocos2d::Layer was inherited from cocos2d::Node - you can investigate this yourself. And this process goes on until the last node in the hierarchy has its visit() method called (picture B.).
We terminate the render to texture operation.
Now it’s time to get the in-memory texture output and apply it to our sprite on the screen.
Viola
Note: It’s possible to accept a cocos2d::Node* instead of cocos2d::Layer* as Postprocess::draw() parameter to make it a more generic method. But, as I commented inside the function instead of:
Because not all cocos2d::Node inherited objects have the visit() method without any parameter (As an example cocos2d::Camera). So, in such cases things will definitely go south if you call visit() with no parameter;
This is what happens under the hood. As I promised this is easier than what comes to your mind originally. Now that you know the internals of this class, applying it to your project is even easier.
First, create a new cocos2d-x project:
$ cocos new ShadersTest -p net.babaei.shaders -l cpp -d X:/path/to/projects/dir/
After creating the project add make_unique.hpp, PostProcess.hpp and PostProcess.cpp files to your newly created project. They must go into Classes folder in your project.
Now it’s time to add the shaders. The shaders are not written by me. In fact, I’ve never written one or do not know how they work. But, as I promised you will receive a copy of those shaders along with this code on my GitHub. I originally took these shaders from here and here. Here are the shaders:
Create a shaders folder inside your project’s resources directory at /Resources and put generic.vert, color_transition.frag and gray.frag inside that directory. So for example, for your gray.frag file, the file path should looks like this: /Resources/shaders/gray.frag.
Make the following changes inside HelloWorldScene.h (I made it easier by commenting the changes, look for those + and - at the beginning of the commented modified lines and a title comment equal to the title of this post):
OK, these are the changes we maded in the above HelloWorldScene.h file in detail:
We first add the forward declaration for PostProcess class instead of including the actual header file in order to keep compile times lower:
classPostProcess;
Then, we defined the sibling layers - just like picture B. - as private member variables including the actual game layer and each post-processing effect’s layer:
#include"HelloWorldScene.h"/*****************************************
// Post-Processing Effects in Cocos2d-x //
#include "PostProcess.hpp"
*****************************************/#include"PostProcess.hpp"USING_NS_CC;
Scene* HelloWorld::createScene()
{
// 'scene' is an autorelease object
auto scene = Scene::create();
// 'layer' is an autorelease object
auto layer = HelloWorld::create();
// add layer as a child to scene
scene->addChild(layer);
// return the scene
return scene;
}
// on "init" you need to initialize your instance
bool HelloWorld::init()
{
//////////////////////////////
// 1. super init first
if ( !Layer::init() )
{
return false;
}
Size visibleSize = Director::getInstance()->getVisibleSize();
Vec2 origin = Director::getInstance()->getVisibleOrigin();
/*****************************************
// Post-Processing Effects in Cocos2d-x //
+ m_gameLayer = Layer::create();
+ this->addChild(m_gameLayer, 0);
+
+ m_colorPostProcessLayer = PostProcess::create("shaders/generic.vert", "shaders/color_transition.frag");
+ m_colorPostProcessLayer->setAnchorPoint(Point::ZERO);
+ m_colorPostProcessLayer->setPosition(Point::ZERO);
+ this->addChild(m_colorPostProcessLayer, 1);
+
+ m_grayPostProcessLayer = PostProcess::create("shaders/generic.vert", "shaders/gray.frag");
+ m_grayPostProcessLayer->setAnchorPoint(Point::ZERO);
+ m_grayPostProcessLayer->setPosition(Point::ZERO);
+ this->addChild(m_grayPostProcessLayer, 2);
*****************************************/ m_gameLayer = Layer::create();
this->addChild(m_gameLayer, 0);
m_colorPostProcessLayer = PostProcess::create("shaders/generic.vert", "shaders/color_transition.frag");
m_colorPostProcessLayer->setAnchorPoint(Point::ZERO);
m_colorPostProcessLayer->setPosition(Point::ZERO);
this->addChild(m_colorPostProcessLayer, 1);
m_grayPostProcessLayer = PostProcess::create("shaders/generic.vert", "shaders/gray.frag");
m_grayPostProcessLayer->setAnchorPoint(Point::ZERO);
m_grayPostProcessLayer->setPosition(Point::ZERO);
this->addChild(m_grayPostProcessLayer, 2);
/////////////////////////////
// 2. add a menu item with "X" image, which is clicked to quit the program
// you may modify it.
// add a "close" icon to exit the progress. it's an autorelease object
auto closeItem = MenuItemImage::create(
"CloseNormal.png",
"CloseSelected.png",
CC_CALLBACK_1(HelloWorld::menuCloseCallback, this));
closeItem->setPosition(Vec2(origin.x + visibleSize.width - closeItem->getContentSize().width/2 ,
origin.y + closeItem->getContentSize().height/2));
// create menu, it's an autorelease object
auto menu = Menu::create(closeItem, NULL);
menu->setPosition(Vec2::ZERO);
/*****************************************
// Post-Processing Effects in Cocos2d-x //
- this->addChild(menu, 1);
+ m_gameLayer->addChild(menu, 1);
*****************************************/ m_gameLayer->addChild(menu, 1);
/////////////////////////////
// 3. add your codes below...
// add a label shows "Hello World"
// create and initialize a label
auto label = Label::createWithTTF("Hello World", "fonts/Marker Felt.ttf", 24);
// position the label on the center of the screen
label->setPosition(Vec2(origin.x + visibleSize.width/2,
origin.y + visibleSize.height - label->getContentSize().height));
// add the label as a child to this layer
/*****************************************
// Post-Processing Effects in Cocos2d-x //
- this->addChild(label, 1);
+ m_gameLayer->addChild(label, 1);
*****************************************/ m_gameLayer->addChild(label, 1);
// add "HelloWorld" splash screen"
auto sprite = Sprite::create("HelloWorld.png");
// position the sprite on the center of the screen
sprite->setPosition(Vec2(visibleSize.width/2+ origin.x, visibleSize.height/2+ origin.y));
// add the sprite as a child to this layer
/*****************************************
// Post-Processing Effects in Cocos2d-x //
- this->addChild(sprite, 0);
+ m_gameLayer->addChild(sprite, 0);
*****************************************/ m_gameLayer->addChild(sprite, 0);
/*****************************************
// Post-Processing Effects in Cocos2d-x //
+ this->scheduleUpdate();
*****************************************/this->scheduleUpdate();
return true;
}
void HelloWorld::menuCloseCallback(Ref* pSender)
{
Director::getInstance()->end();
#if (CC_TARGET_PLATFORM == CC_PLATFORM_IOS)
exit(0);
#endif
}
/*****************************************
// Post-Processing Effects in Cocos2d-x //
+void HelloWorld::update(float delta)
+{
+ m_colorPostProcessLayer->draw(m_gameLayer);
+ m_grayPostProcessLayer->draw(m_colorPostProcessLayer);
+ //m_nextPostProcessLayer->draw(m_grayPostProcessLayer);
+ //m_anotherPostProcessLayer->draw(m_nextPostProcessLayer);
+ //...
+}
*****************************************/void HelloWorld::update(float delta)
{
m_colorPostProcessLayer->draw(m_gameLayer);
m_grayPostProcessLayer->draw(m_colorPostProcessLayer);
//m_nextPostProcessLayer->draw(m_grayPostProcessLayer);
//m_anotherPostProcessLayer->draw(m_nextPostProcessLayer);
//...
}
OK, time to break down the changes in HelloWorldScene.cpp file:
We first include the header file for PostProcess class that we forward declared earlier:
#include"PostProcess.hpp"
After that, the first and foremost step involves initializing the sibling layers including m_gameLayer, m_colorPostProcessLayer and m_grayPostProcessLayer at the beginning of HelloWorldScene::init() method. Notice the z-orders that we specified when we were adding them to the current scene using addChild method:
As I guarantied adding and removing effects requires the least of efforts. You can easily enable or disable any effect inside this method. For example, if you need to disable both effects immediately, commenting the first two lines will suffice:
Just note that if you need to change the order of post-processing effects, the proper way to do so is to modify the z-orders at the initialization time at the beginning of HelloWorldScene::init() method first which we have discussed already. Then process each layer at HelloWorld::update() in the exact same order.
Note: Unfortunately, this method won’t work on scenes with Sprite3D and Billboard nodes. Technically speaking, there is no way to render Sprite3D objects - and probably any other 3D node - to a texture in Cocos2d-x, yet. And, you’ll get a NULL Camera object inside BillBoard::calculateBillbaordTransform() method on each call to visit() which causes Cocos2d-x to crash when you have a Billboard node inside your gameLayer. It has been asked quite a few times on their forum. I also asked it on Stackoverflow without any luck.
You can checkout the source code for this tutorial at: